Are you ready to get into the festive spirit without it costing an arm and a leg? There’s no better way to bring Christmas into your home than with a little DIY. Even better, you can get the kids involved. Here’s a great DIY Christmas Wreath that’s easy to follow and will get the whole family involved.
Set to adorn your front door or as a beautiful centrepiece for the dining table, wreaths are super easy and seriously satisfying to make yourself. This year I wanted to do a floral DIY Christmas wreath. I’ve seen these in various stores ranging from $150 to $200+ and thought ‘surely I can do better myself?’. So, after searching through a few stores that I know sell faux flowers, I found everything I needed to bring my vision to life.
DIY Christmas Wreath
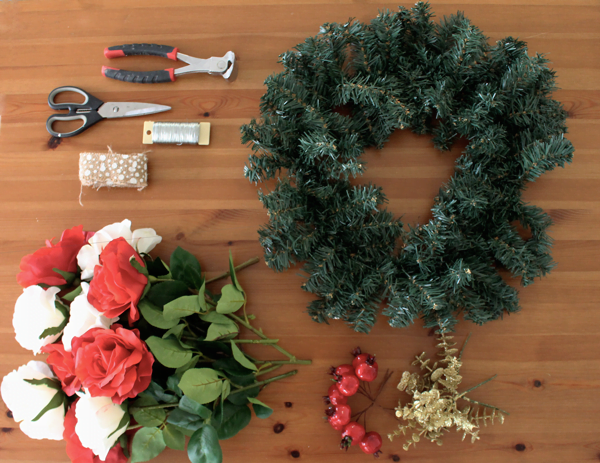
You will need:
- Plain Christmas wreath (you can get these from Spotlight)
- Faux flowers – I used 11 extra large roses (you can get these from Kmart)
- Holly Berries on wire stems (Spotlight)
- Glittery decorations on wire stems (Spotlight)
- Pliers or wire cutters
- Scissors
- Florist Wire (Spotlight)
- Ribbon (Spotlight)
How to make your Christmas Wreath
1. Trim the flowers
Start by pulling the leaves off the faux flowers (keep the leaves for later, they may just come in handy). Once you have pulled the leaves off, trim the stems just below the receptacle (as pictured) to ensure your flowers don’t fall apart!

2. Work out the layout
Once all your flowers are trimmed, spend some time playing with how you’d like everything laid out. A cluster of flowers at the base or flowers all around the edge? I probably spent more time on the actual layout than I did putting the whole thing together! When you’ve got it set out how you like, make sure you take a couple of photos to use as a guide for when you are securing everything.

3. Thread & Twist!
Using the florist wire, cut lengths of about 20cm, thread the wire between the outer petals and the receptacle so you have equal lengths on either side – then twist until tightly secured (about 5 twists), you should be left with two wire tails that are about 10cm in length.

4. Twist the flowers on the wreath
Using your guiding photos, start to place the flowers on the wreath, wrap the wire tails around the wreath frame and then twist again to secure. I gave all of mine a little wiggle room so I could manoeuvre them a little bit once all the flowers were attached.
5. Add some Christmas touches
While I would have loved to leave my wreath with just flowers, to add some Christmas charm I also used holly berries and some gold glittery holly leaves (on wire stems). Being on a single stem of wire, I simply just hooked these around the frame of the wreath and gave a little twist to secure. I also took a few of those leaves from the rose stems to make the wreath nice and lush, again – more wire and twisting.
Note: You could also use hot glue to attach all your flowers and decorations but I prefer to use the wire as it’s not so permanent and each year I can update my wreath to a new style.
6. Add some ribbon & hang!
Finally use a length of ribbon (about 30-40cm) to give your wreath a hook to hang on. Simply wrap the ribbon around the top of your wreath frame, tie a bow and voila – ready to hang!


Tips: do you have some eager kids who want to help as well? Why not buy some extra decorations and let them make their own DIY Christmas wreaths for their bedroom doors. It’s a cheap and cheerful holiday activity that they will cherish (and it means you get free reign on your wreath).