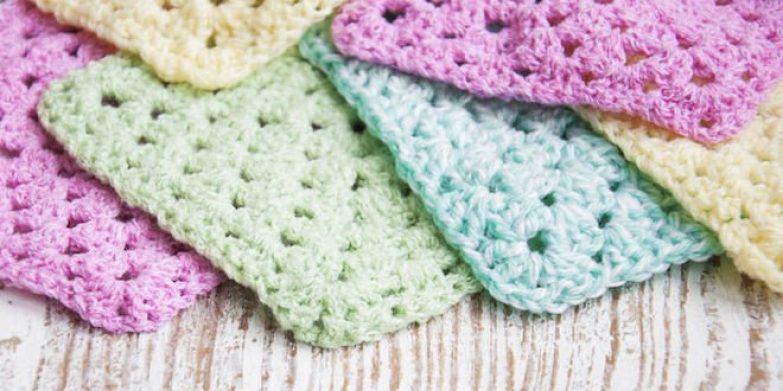
Want to learn how to crochet ‘granny square’ blankets? Granny squares are a great first crochet project for beginners. And once you get more ‘hook time’ under your belt, they can be adapted in a whole load of different ways by adding more complicated stitches and colour combinations.
Below you’ll see how to crochet the basic granny square in a single colour. You can either make lots of little granny squares (just stop crocheting when your squares reach your ideal size) and then sew them together to make a blanket. Or you can just keep crocheting for one massive granny square blanket.
One of the great things about crocheting over knitting is that, if you make a mistake, you can just take out the hook, pull the yarn until you get to the stitch before the mistake, insert the hook and simply crochet the stitches again – there’s no such thing as unwanted holes or trying to pick up missed stitches!
Guaranteed, once you start crocheting, you’ll become hooked!
Granny Squares: What you need
Balls of wool or cotton blends
How much yarn you require will depend on how big you want your blanket. For a baby blanket, 5 x 50g balls should make a blanket about 80cm x 100cm.
Tips:
- Chunkier wools will give you a thicker blanket with big stitches, while lighter wools (such as baby wool) will give you a thinner blanket with smaller stitches and so will take you longer to crochet to your desired size.
- Choose a single colour, or when you are more confident, go all out with a whole stack of complementary colours for a multicoloured blanket (you could choose a new yarn colour for each round, for example).
A crochet hook
Take a look at your chosen wool to see the size of needle suggested for knitting/crocheting. If the wool suggests 5mm needles, then purchase a 5mm crochet hook (Spotlight, Lincraft and other crafty stores have them for only a few dollars each).
Patience
Learning to crochet can seem a little tricky at first, but it’s really quite easy, and once you get the hang of a stitch it will become second nature.
Types of stitches used to make a granny square
There are three stitches used to crochet granny squares. If you don’t know how to do them, you can easily see how by watching the YouTube videos suggested.
Chain Stitch
ch = chain
Slip Stitch
sl st = slip stitch
Treble Crochet
tr = treble
How to crochet granny square blankets
See stitch abbreviations above
Attach the yarn
Use a slip knot to attach the yarn to the hook, leaving a long tail (about 5cm).
Create a circle
Ch 4. Put hook through first ch and join with last stitch using a sl st. You now have a ring.
Round 1
- Ch 3 (counts as 1 tr). Work 2 tr into ring. Ch 2.
- Work 3 tr into ring. Ch 2.
- Work 3 tr into ring. Ch 2.
- Work 3 tr into ring. Ch 2.
- Join to top of first ch 3 using a sl st.
Congratulations! You have now completed one round! The large holes (made by the chains) are the corners of your square.
Round 2
- Turn your square over so that the other side is facing you.
- Ch 3 (counts as 1 tr). Work 2 tr in the chain space below. Ch 2.
- In the next chain space below, work 3 tr, ch 1, 3 tr (to form a corner). Ch 2.
- In the next chain space below, work 3 tr, ch 1, 3 tr (to form another corner). Ch 2.
- In the next chain space below, work 3 tr, ch 1, 3 tr (to form a third corner). Ch 2.
- Back at the initial corner space, work 3 tr, ch 1, then join to top of first ch 3 using a sl st.
You have completed the next round.
Round 3
- Turn your square over so that the other side is facing you.
- Ch 3 (counts as 1 tr). Work 2 tr in the chain space below. Ch 2.
- In the chain space between the next 2 groups of 3 trebles, work 3 tr. Ch 2.
- In the next chain space, work 3 tr, ch 1, 3 tr. Ch 2.
- In the chain space between the next 2 groups of 3 trebles, work 3 tr. Ch 2.
- In the next chain space, work 3 tr, ch 1, 3 tr. Ch 2.
- In the chain space between the next 2 groups of 3 trebles, work 3 tr. Ch 2.
- In the next chain space, work 3 tr, ch 1, 3 tr. Ch 2.
- In the chain space between the next 2 groups of 3 trebles, work 3 tr. Ch 2.Back at the first corner, work 3 tr, ch 1, then join to top of first ch 3 using a sl st.
Round 4 etc
- Turn your square over so that the other side is facing you.
- Ch 3 (counts as 1 tr). Work 2 tr in the chain space below. Ch 2.
- Repeat trebles and chains, so that there are 6 tr (with one ch in between) at each corner and 3 tr in the chain spaces in between. At final corner, work 3 tr, ch 1, then join to top of first ch 3 using a sl st.
- Complete each round until you reach your desired blanket or square size.


