Thinking about a bathroom renovation? Knowing where to start can sometimes be the biggest hurdle! North Shore Mums Founder Rachel Chappell has renovated two bathrooms in her house over the last few years, and shares her tips and experiences along the way.
Undertaking a renovation project can be quite daunting, particularly when you’re not an interior designer, or don’t have a lot of experience with home renovations. You might have a Pinterest board bursting with ideas you love, but don’t know how they’ll look in your home, which to choose or how to bring them to life.
With two bathroom renovations over the last few years, I’m certainly not an expert, but I’ve learnt a lot about the process and wanted to share some tips for other first-time renovators.
Option 1: Choose a bathroom company to do the renovation
Ensuite bathroom
When we renovated our ensuite in 2018, I used a bathroom renovation company to manage the entire renovation project. I had three companies quote on the job, but ultimately chose the one I felt I could trust the most.
A Project Manager looked after every step of the process – measuring up, quoting, design consultation and managing all the trades. They used a very simple package structure, where everything (fittings, fixtures & trades) was bundled up into one quote. They told us what we needed to get for the space, and we simply had to visit their showroom to make the selections for our bathroom. Easy!
Although we paid more for the luxury of having it project managed, it was worth it for the time and stress it saved. It was a secure option for a first-time bathroom renovator.
The advantages of choosing a ‘one stop’ bathroom company was:
- Peace of mind. Everything was managed by professionals and experienced builders.
- They used tradespeople that they had used for many other projects, so knew they were reliable.
- Saved me time. We didn’t waste days visiting different bathroom showrooms.
- If anything went wrong, I knew I had one company to deal with to sort it out.
- As they were a ‘big’ company, I felt more protected.
-
- Timberline Cabinet
-
- Luciana toilet and heated towel rail
-
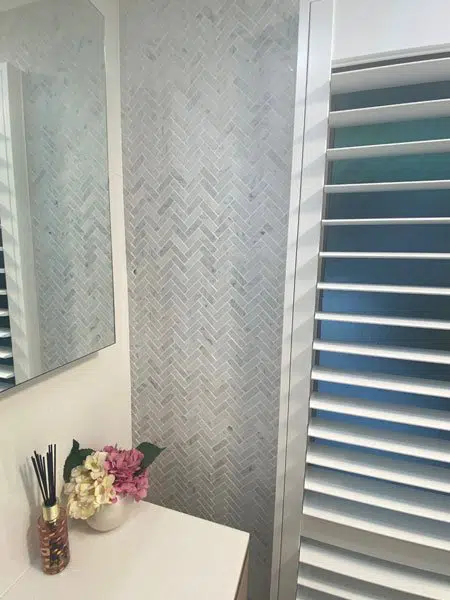
- Herringbone Tiles
-

- LED strip lighting under shaving cabinet
-
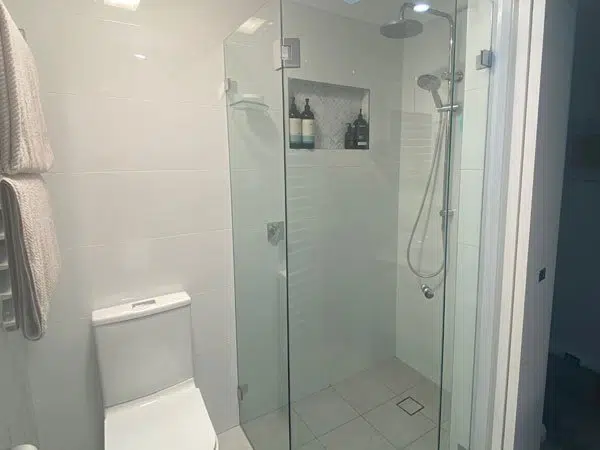
- Frameless shower
-
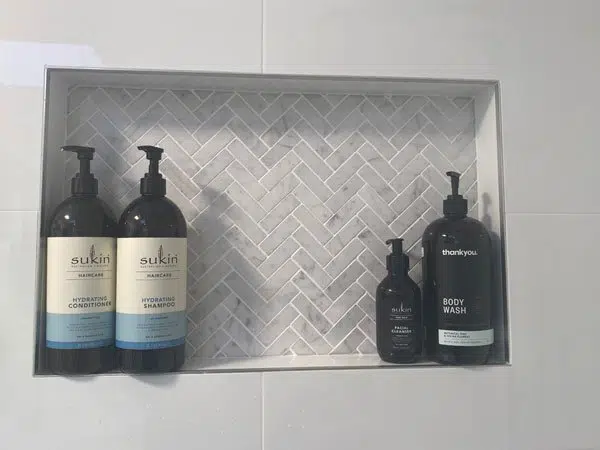
- Recessed area for toiletries in shower
Option 2: Choose a builder and buy your own bathroom supplies
When we decided to renovate our main bathroom recently, we chose a local builder to manage the project, and picked out our own bathroom supplies. This time, I was more familiar with the process and also had a much clearer idea about how I wanted the bathroom to look and function.
We’ve used this builder for other projects around the house, so I knew first-hand that he was reliable and had high standards. He’s done many other bathrooms too, and after getting him around to measure and quote, I knew he’d be perfect for the job. Trust is so important!
After the initial consultation, he provided me with a list of all the items I’d need to buy for the bathroom, including the ideal dimensions of these for the space. He recommended Ideal Bathrooms (who have a showroom at Macquarie Park and Hornsby), as they have an extensive range of options, and will go above and beyond to source anything that’s not there – and at the best possible price.
The overall look
Choosing the fixtures
As we had only renovated our ensuite a few years ago, we wanted our new bathroom to complement it in a similar style, but didn’t want it to be identical.
We decided to choose similar fixtures and fittings for the main bathroom (vanity, mirrored shaving cabinet), with few minor changes:
- Addition of a bath
- Different basin
- Different taps
This made the job of choosing the fixtures much easier. I simply went back to the original quote from the ensuite to get the full product names of the fixtures I wanted and headed to the Ideal Bathrooms showroom at Macquarie Park. The consultant was quickly able to source the same items for me, and the big order meant he could give me a discounted package price.
Choosing the tiles
Choosing the wall tiles was the biggest decision we had to make, as it was going to be the most striking difference between the two bathrooms. After visiting a couple of local tile showrooms on the Upper North Shore, I was quite overwhelmed with the huge variety of styles, colours and sizes available.
I then went online and was drawn to the Australian Made designs by Sanctuary Makers tiles. They had a big range of gorgeous tiles, and I just loved their online ‘visualisation’ tool, where you could view the many different patterns in various colours, in a range of different room scenarios. For someone who isn’t great at visualising the ‘end result’, this was an absolute game-changer – it was easy to see what a small sample of tiles might look like on a big wall in the bathroom. Ordering samples of my favourites was also very helpful in the decision-making process – especially when they are delivered straight to my door within days!
After several days of deliberation and a looming start date, I knew I needed to make a final decision! So my husband and I narrowed it down to the colour we loved (Millpond, which is an aqua colour, but not too bright)… and either the Fan design (like a fishtail) or the Herringbone. I loved the Fan design for a kids’ bathroom, but I was worried it might not have wider appeal and ultimately resale value.
So to help us choose, I decided to get some thoughts from North Shore Mums. I posted on our Facebook page, and was so grateful for the many comments and suggestions. In the end, it gave me reassurance that the Fan design was loved by many. We have a marble herringbone in our ensuite, so I was excited to have a different style.
Scale is slightly softer visually. Beautiful colour!
Koi (fan) for bathroom. It’s softer look. And round fittings.
Koi for a bathroom. Herringbone is good in kitchens.
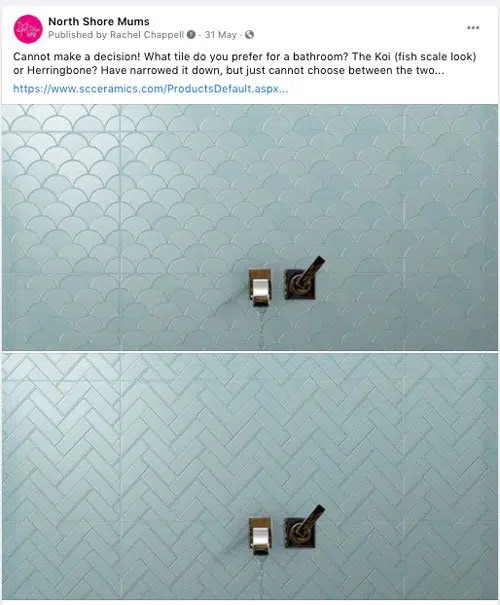
Outsourcing the final tile selection to North Shore Mums!
We decided on the Adorn Fan Millpond (Satin) on one wall (the one you faced as you entered the bathroom), and was advised by their Design Consultant to choose a satin finish for the white tiles on the other three walls, so we went with the Adorn Casa Cotton (Satin). All wall tiles were a large 600 x 300 size.
The timeline
It took 4 weeks for our fixtures to be delivered (as some of it had to be custom made) and the tiles took 2 weeks to arrive (as they were also made to order in Melbourne).
Once we knew when we’d have all the supplies, we advised the builder who was quick to put together his timeline. By scheduling the tradespeople well, we didn’t have many days where ‘nothing’ was happening (though some processes need a few days in between – like the waterproofing, and laying of the underfloor heating). After demolition, the bathroom was complete in just under three weeks.
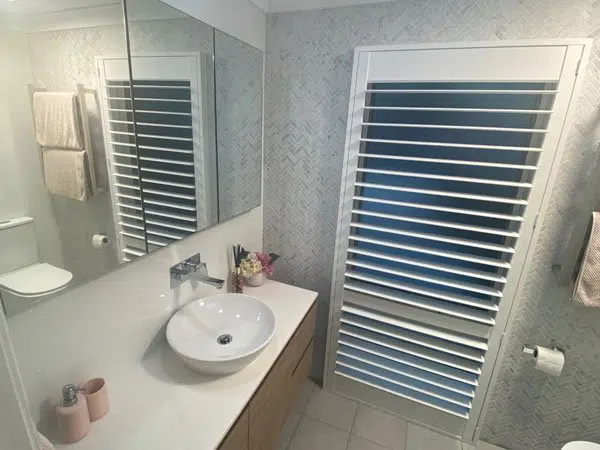
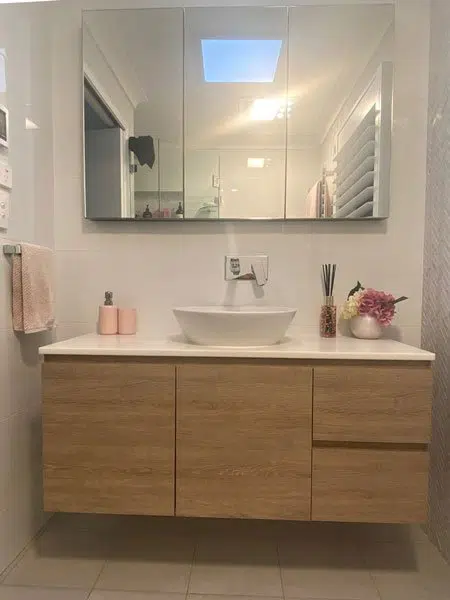
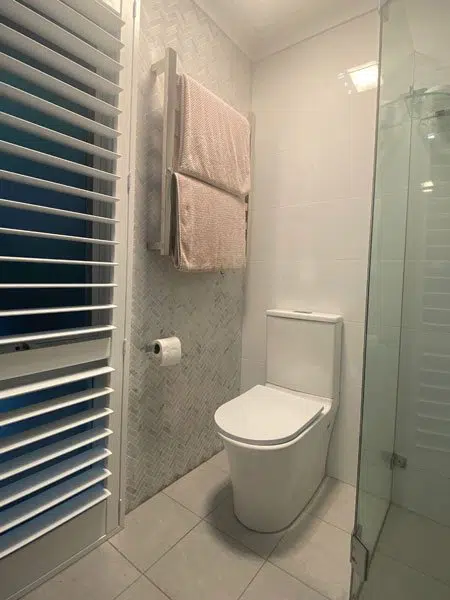
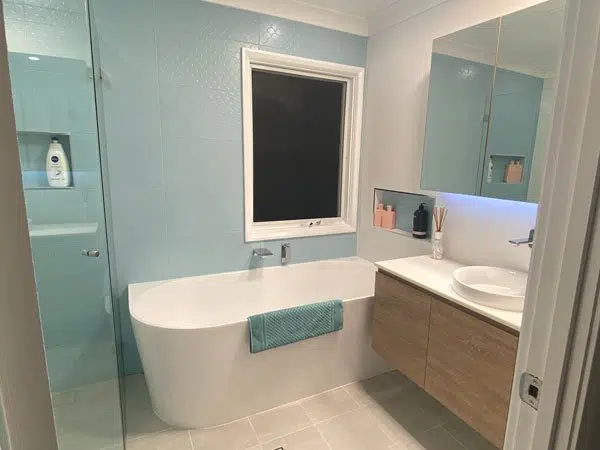
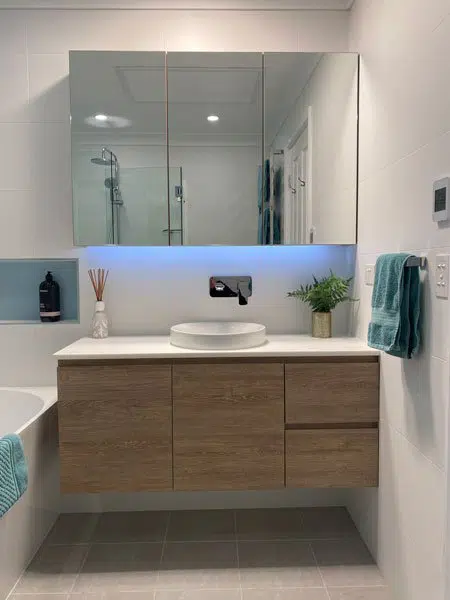
The renovated bathroom
And voila! After three weeks of almost daily visits from various tradespeople, our bathroom was complete, and we’re delighted with our brand new stylish yet functional bathroom.
7 things I love about our new bathroom
- Storage: The combined storage of the vanity and the shaving cabinet is huge! With three girls and expanding toiletry & cosmetic requirements, there will always be plenty of space to store their bits & bobs.
- Underfloor heating: It’s a little luxury that makes walking around the bathroom in bare feet so much more pleasurable. Plus it also helps to keep the floor dry.
- LED strip lighting under the shaving cabinet: This not only looks really stylish, but it’s very useful at night – as it gives off a dim light and is perfect for middle-of-the-night visits to the loo.
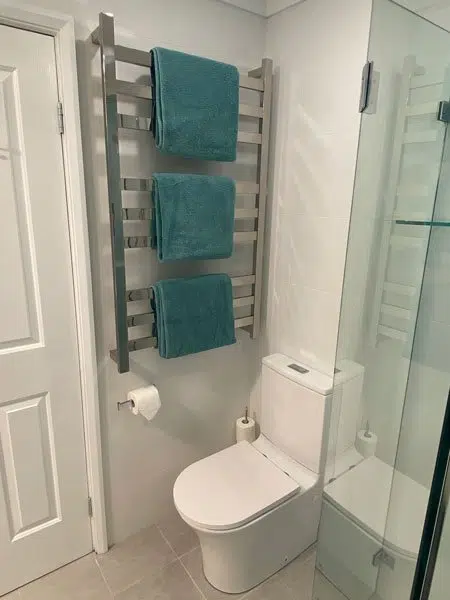
- Large heated towel rail: It’s big and takes up a large chunk of one wall, but three rungs means there’s a spot for each child.
- The wall tiles: Every time I walk into the bathroom, I’m so pleased with our decision on the Millpond Fan. The bright colour and fun design makes me feel happy inside!
- The recessed areas for toiletries: I love the little recessed areas in the shower and above the bath to store the shampoo, conditioner, shower gel and other toiletries. It’s such a neat way of keeping everything together!
- Sink: The design of this sink is perfect for messy kids. It’s half recessed into the vanity, and seems to keep splashes within the sink.
-
- Bathroom renovation
-

- Bath: Cassa Design Auris Corner Back to Wall Bathtub
-
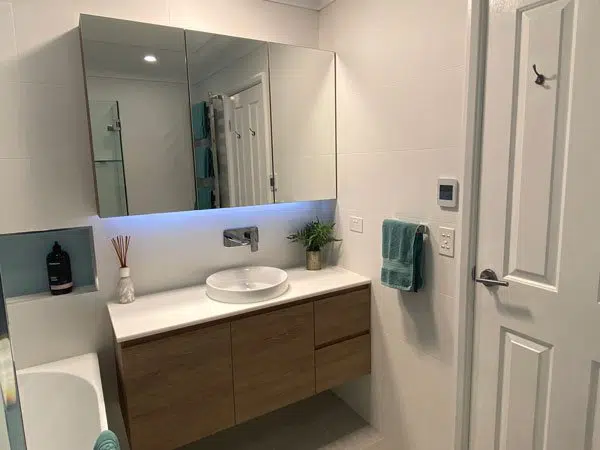
- Shaving Cabinet: Moonlight Mirrored Cabinet 1200, Surround View, 3 Doors,
-
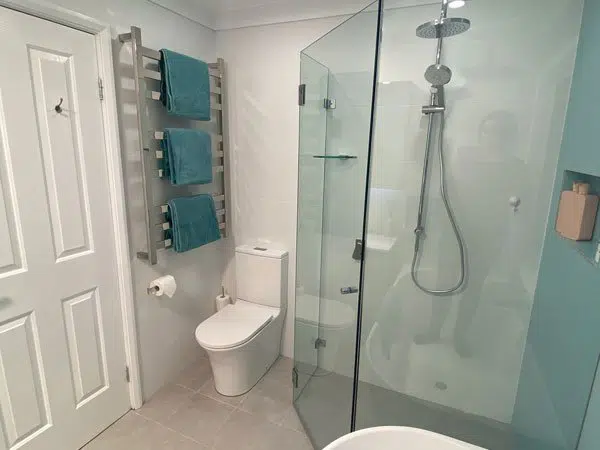
- Toilet: Luciana Back-to-Wall Suite
-
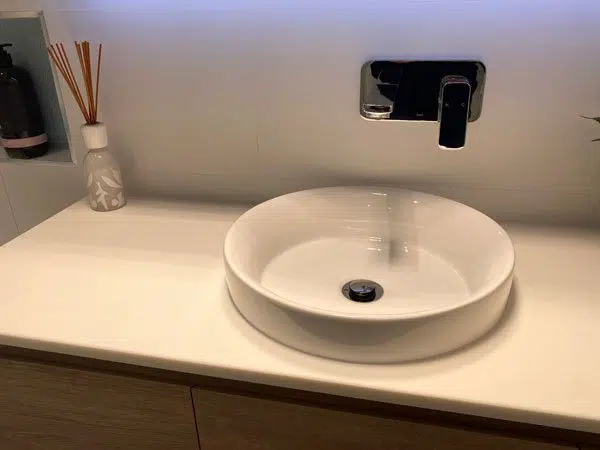
- Sink: Radius Inset Basin, Gloss White
-
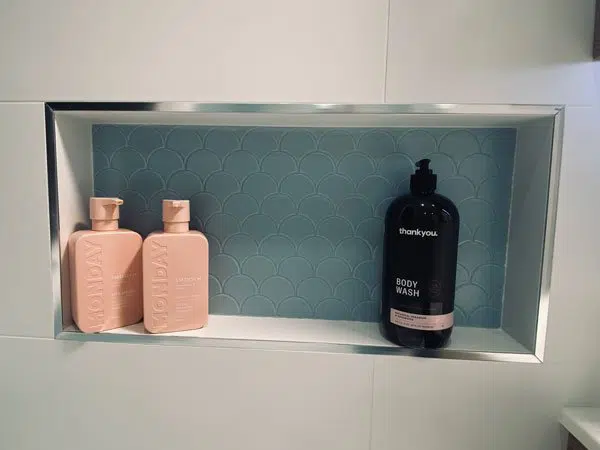
- Recessed area for toiletries
-
- Vanity: Timberline Nevada 1200mm, Wall HungRight Hand Drawers, Fingerpull, Rural Oak
-
- Heated towel rail: Thermogroup SFS69M Straight Flat Ladder Heated Towel Rail, 700 x 1200
-
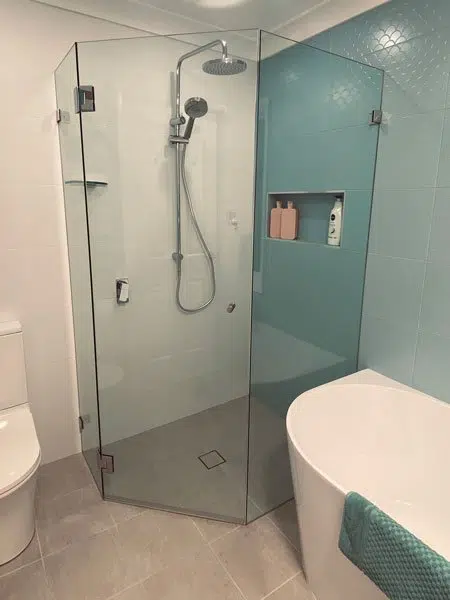
- Splayed frameless shower screen with pivot swinging door and 10mm clear toughened safety glass
Want more renovation ideas for your home?
- Creating a great study space (that grows with your kids!)
- Making a home beautiful: An expert’s (easy) advice
- Renovating? Discover stylish Australian-made tiles from Sanctuary Makers
- Investing in property: Tick tock on the property clock!
- Frame it! The stylish and practical way to display your child’s school photos