Have you been tasked with helping your child to make an Easter Hat for the Easter Hat Parade? Whilst crafty mums might be rejoicing, the time-poor mums might be feeling a bit stressed about yet another item on the ‘to-do’ list! Fear not. We’re coming to the rescue with easy, affordable ideas for an impressive Easter Hat.
These Easter hats are not just gorgeous; they’re cheap and easy to assemble. Many start with a hat you probably already own, topped with pretty or fun embellishments that you can pick up at any arts and crafts shop or discount store. Try to create the same look, or use them to inspire your designs.
Easter Hat Ideas for the Easter Hat Parade
1. Fluffy Bunny Hat
-
- Fluffy Bunny front
-
- Fluffy Bunny back
You’ll need:
- A wide-brim hat or sturdy paper/cardboard hat base
- White cotton wool or toy stuffing
- Pink fabric or felt (for ears)
- Card or foam for eyes and nose
- A small carrot decoration (real or craft)
- Ribbon or bow for the back
- Strong craft glue or a hot glue gun
To make:
Start by covering the entire hat with cotton wool or stuffing, layering it to create a fluffy “bunny fur” effect. Cut two tall ear shapes from card, then cover with pink fabric or felt and attach them securely to the top of the hat. Create eyes and a nose using card or foam and glue them onto the front. Add a carrot detail across the front brim for a fun touch. Finish by attaching a large bow or decorative element at the back. Allow everything to dry completely before wearing.
2. Floral Chic
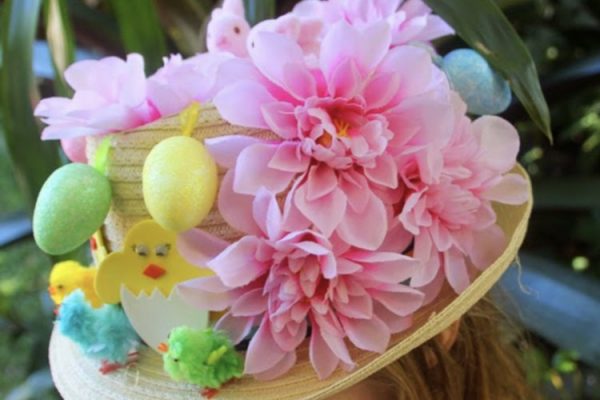
This pretty hat is easily made from Styrofoam eggs in assorted colours and coordinating coloured ribbon
You’ll need:
- A hat with a wide brim
- Silk flowers
- Styrofoam eggs in assorted colours (you can also buy white styrofoam eggs and paint them) and coordinating ribbon
- Chicks in assorted colours
- Small pink bunnies
- Foam cut-out chicken shapes or similar
- Strong craft glue or a hot glue gun
To make: Attach a matching ribbon to each foam egg with glue or a stapler. Place all items randomly over the hat until you are happy with the arrangement (note that the flowers look better when bunched together). Attach all the embellishments with glue, then set the hat aside to dry completely.
Tip: If you wish to reuse the hat, attach the embellishments using small safety pins or staples so that you can remove them later.
3. Car Crazy Hat
You’ll need:
- A hat (felt, foam or cardboard base works well)
- Toy cars in assorted colours and sizes
- Green felt, foam or fabric (for a “grass” effect)
- Small Easter decorations (optional – eggs, chicks, etc.)
- Strong craft glue or a hot glue gun
To make:
Start by covering the top of the hat with green felt or fabric to create a grassy base. Arrange the toy cars across the top, spacing them out until you’re happy with the layout. You can place them in a line like a road or scatter them for a playful look. Add small Easter decorations, such as mini eggs or chicks, between the cars if desired. Once you’re happy with the design, glue everything firmly into place and allow it to dry completely before wearing.
4. Carrotastic!
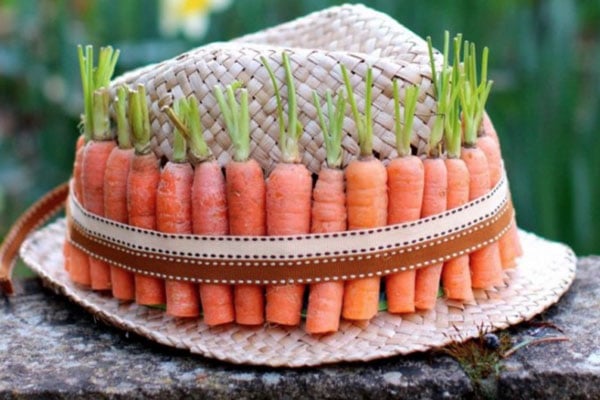
Use real carrots or fake ones! Simple but effective
You’ll need:
- A hat with a brim
- Length of ribbon
- About 35 baby carrots
To make: Trim both ends off the carrots, leaving about 2cm greenery. Tie the ribbon around the hat, knotting it securely at the back (don’t make the ribbon band too tight), and letting the ends hang loosely. Push the carrots down behind the ribbon.
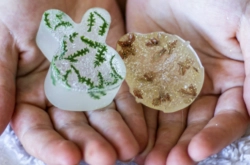
5. Do-You-Think-He-Saurus?

Because the eggs and dinosaurs are quite heavy, they will need quite a bit of glue.
You’ll need:
- Old hat with a wide brim
- 1 or more plastic dinosaurs
- Speckled eggs
- Plastic ferns and other leaves
- Hot glue gun
To make: Play with all elements over the hat until you are happy with the arrangement. Using the hot glue gun, keep everything in place. Note that because the eggs and dinosaurs are pretty heavy, they will need quite a bit of glue. Set aside to dry completely.
Tip: Buy white Styrofoam eggs and paint them. These will attach much more easily, and young ones are less likely to want to eat them!
6. Sunny Sunflower Hat
You’ll need:
- A wide-brim hat or a cardboard hat base
- Coloured paper or cardstock (yellow, white and orange)
- Crepe paper or tissue paper (for the centre)
- Small Easter decorations (mini eggs, chicks, etc.)
- Craft glue or a hot glue gun
To make:
Start by creating large petal shapes using coloured paper or cardstock. Attach these evenly around the brim of the hat to form a sunflower effect, layering different colours for extra impact. Cover the top of the hat with scrunched crepe or tissue paper to create a textured centre. Add small Easter decorations like mini eggs or a chick on top for a festive touch. Once you’re happy with the design, glue everything securely in place and allow it to dry completely before wearing.
7. Cheeky Chicks
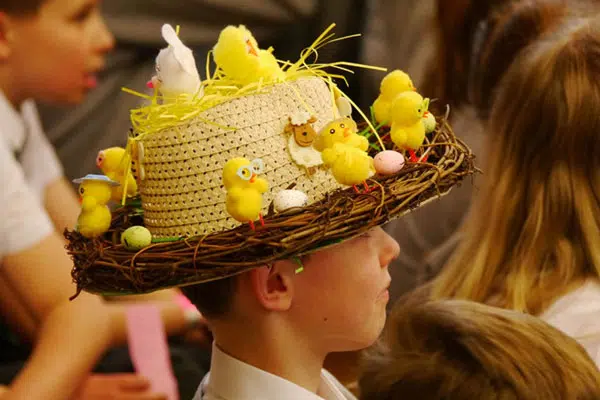
You’ll need:
- A hat with a wide brim (frayed edges are a plus!)
- About six chickens and another six baby chickens
- Shredded paper
- Round of cardboard to fit the top of the hat
- Easter ribbon
- Craft glue, stapler
To make: Glue a handful of shredded paper into the cardboard circle in a shallow nest shape. Staple or glue baby chickens into the nest. Arrange larger chickens around the hat’s brim and staple them to secure. Tie the Easter ribbon around the hat.
8. Easter Explosion Hat
You’ll need:
- A hat (felt, foam or cardboard base)
- A cardboard paper towel roll
- Plastic Easter eggs in assorted colours
- Strong craft glue or a hot glue gun
To make:
Start by securely attaching the cardboard paper towel roll to the top of the hat to create height. Once it’s firmly in place, begin gluing plastic Easter eggs around the roll, stacking and layering them as you go. Work your way up and around the tower, mixing colours for a bright, playful look. Keep building until the roll is completely covered and you’re happy with the overall shape. Allow everything to dry completely before wearing.
9. The Ears Have It
If you are handy with a sewing machine, sew the fabric onto the ears!
You’ll need:
- A bunny ears headband
- Small pieces of beautiful fabric or thick wrapping paper
- Small silk or plastic flowers in assorted colours
- Butterfly pin or similar
- Strong craft glue or a hot glue gun
To make: Draw ear shapes onto the fabric or wrapping paper, the size of the inner section of the bunny ears, and cut them out. Using glue, attach the fabric/paper to the inner ears. Place flowers randomly around the base of the ears until you are happy with the arrangement. Using glue, attach the flowers. Place a butterfly above the flowers on one ear and glue it in place. Set the ears aside to dry completely.
Tip: If you are handy with a sewing machine, you can sew the fabric onto the ears (turning over the cut edge to create a hem) for a neater look.
EASTER EVENT GUIDE: BEST EVENTS IN SYDNEY
10. Reptilian Rapture
To decorate, position the leaves and critters around the base of the ears until you are happy with the placement
You’ll need:
- A bunny ears headband
- Small pieces of striking fabric or wrapping paper
- Selection of plastic bugs and reptiles
- Silk or plastic leaves
- Craft glue, a hot glue gun or a stapler
To make: Draw ear shapes onto the fabric or wrapping paper, the size of the inner section of the bunny ears, and cut them out. Using glue, attach the fabric/paper to the inner ears. Position the leaves and critters around the base of the ears and partially up the ears until you are happy with the placement. Glue or staple all elements in place. Set aside to dry any glue completely.
11. All Ears
You’ll need:
- Sheet of cardboard
- Floral fabric (for the inner ears)
- Plain fabric or felt (optional backing)
- Small artificial flowers in assorted colours
- Butterfly decoration
- Strong craft glue or a hot glue gun
- Stapler
To make:
- Measure around your child’s head (from forehead to back) to work out the hat circumference. Transfer this measurement onto the cardboard, adding an extra 2cm, then draw a second line about 12–15cm above and cut to create a band.
- Using the remaining cardboard, cut out two tall bunny ear shapes. Cut matching inner ear shapes from your floral fabric and glue them neatly onto the cardboard ears, pressing firmly to smooth out any bubbles.
- Form the cardboard strip into a circle, then secure it with glue or staples to create the hat base.
- Attach the ears to the inside front of the hat band using glue or staples so they stand upright.
- Create a floral crown effect by gluing small flowers along the front edge of the hat, clustering them for a full, colourful look. Add a butterfly on one side for a pretty focal point.
- Allow everything to dry completely before wearing.
12. Easter Fascinator
You’ll need:
- A plain headband
- Small artificial flowers (pastel colours work beautifully)
- Mini Easter eggs
- Ribbon and/or tulle
- Feathers (optional)
- Strong craft glue or a hot glue gun
To make:
Start by choosing one side of the headband to decorate (this keeps it looking like a true fascinator). Create a base by looping ribbon or tulle and gluing it in place. Layer flowers over the top, then nestle in mini Easter eggs to build texture and interest. Add a feather or two for a soft, whimsical finish. Keep everything clustered to one side for that classic fascinator look, then secure firmly with glue and allow to dry completely before wearing.
13. Easter Beanie
You’ll need:
- A beanie
- Magnetic or foam letters to make the word EASTER
- Wool needle
- Wool in a complementary colour to the beanie
To make: Arrange the letters over the front of the beanie. Secure each in place using the needle and wool.
14. Paper Easter hat
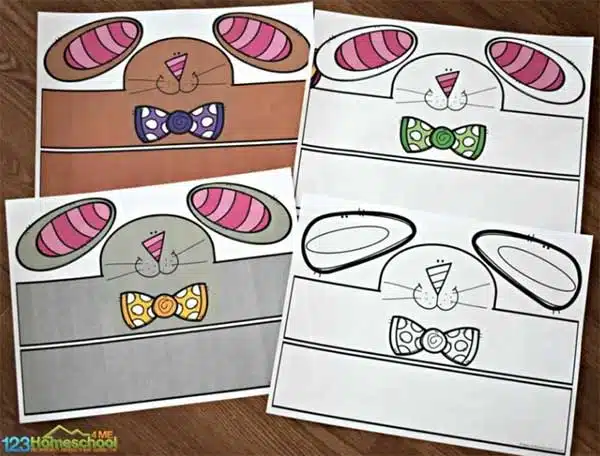
Have a little fun with your Easter creation, while also keeping it nice and simple! Grab free, printable templates and let the kids do all the hard work. Set them up with crayons, pencils, glitter and anything else they can use and let their imagination soar. It’s cheap, it’s easy, and it’s 100% homemade by your child. What could be better?
You’ll need:
- Download and print a template
- Crayons
- Pencils
- Glitter
- Craft supplies
To make: Measure it around your child’s head before they start creating it so you know it fits!
15. Origami Easter hat
Do your kids love origami? Or perhaps they’re a fan of all those how-to crafting YouTube videos. This is the Easter hat for them! Simply follow the video to create a floral Easter bonnet that is just waiting to be shown off at that Easter hat parade.
You’ll need:
- Coloured paper
- Plastic plate
- Glue
- Ruler
- Scissors
- Ribbon
To make: The flowers can be a little time-consuming to make. It might be good to split this activity up across a couple of sessions!
EASTER EVENT GUIDE: BEST EVENTS IN SYDNEY